Showing posts with label kitchen design. Show all posts

Thursday, May 19, 2011

DIY Kitchen Cosmetic Makeovers on Apartment Therapy


I'm sorry for my absence lately, but the good news is I'm BUSY!  Aside from the seminar I gave last week, and the 4 great new clients I recently picked up, I'm also helping my wonderful aunt & uncle with their new home in Michigan, as well as attempting to conquer my bare backyard, training for a century road bike ride, AND planning a wedding!  Whew!  But the seminar is over, and though I'm busy playing catch-up, I am going to be back to blogging... soon.  I'm not back 100% yet though, so this is sort of a cop-out post.  I'm actually just re-posting a great post from Apartment Therapy.

Apartment Therapy just featured 10 Before & After kitchen makeover projects that are perfect inspiration for you DIY folks out there.  If you aren't at a point where you can completely remodel or reconfigure your kitchen, a cosmetic facelift will often buy you some time.

My favorites of those featured are the kitchen shown above, and this one:


After

If any of you ever try a DIY makeover like these, please share photos with me!   I'd love to see what you do!

Tuesday, March 29, 2011

More Photos: White Kitchen Remodel

Last week I showed you all some before & after photos of a recent project I designed.  Now that you've all got a sense of the significant layout changes involved in this design, I thought I'd post more of the after photos and details.


the Lemans corner system (see it in action here).  I love this thing!
pull-out spice rack

roll-out pantry shelves

faucet operated by foot-pedals (my client is a surgeon and wants to keep everything sanitary!)

Sometimes you need to custom-design an entire cabinet for very specific pieces.  Everything needs to have its place, right?

Wednesday, March 23, 2011

Before & After: White Kitchen Remodel


I'm really proud of the outcome of this kitchen remodel.  It's beautiful and bright and just plain happy.  But you don't get the full sense of this space until you see before photos and realize the major layout changes that made this kitchen what it is.

The large opening shown above used to be this brick wall:

The powder room (the closed white door to the left) used to be straight off the kitchen, directly across from the refrigerator: 

Now the powder room (still in the same location) is in a corridor just off the kitchen:

The doorway location from the dining room (to the right in the photo) prevented any deep base cabinets, and therefore the space by the window wasn't very functional: 

Now the doorway has been relocated to the right side of that wall, allowing for a working kitchen uninterrupted by traffic flow:

Quite a difference, huh?  Not to mention the layout aspects you can't see - how we made sure each cabinet was as functional as possible, so everything had it's place.  More after photos to come in another post...

Architect:  Tom Buese
Contractor:  Sam Sampinos 


Wednesday, March 16, 2011

The Biggest Single Line Item of Any Project...


I just read an interview with Mick De Giulio in an old issue of "Renovation Style" magazine (Summer 2010).  If you read my blog regularly, you know I pretty much idolize this guy.  In fact, let me post one my favorite kitchens ever here (yes, I know, I've posted it before, but it's just SO beautiful!):


Anyway, I fell in love with his response to the question, "What's worth the splurge?"
"It's worth the splurge to do what you want.  The biggest single line item of any project can be regret.  You regret that you didn't the get cabinet you loved or the range that you loved.  When you're done, the kitchen is an expensive room at any level.  If you are not entirely happy with it, then that's expensive."

How true!  I understand that budget is important, and you can't have EVERYTHING you want, but when you find that ONE item that you absolutely fall in love with, whether it's a piece of furniture, or an appliance, or a countertop, or a cabinet style, figure out how you can make it happen because the worst possible outcome is that you go through the entire design & construction process, just to step back and say "Hmmm... it's okay, but it really would have looked great with that Calcutta Gold countertop".  As a designer, if my clients have these types of regrets at the end of a project, then I haven't done my job properly.  Part of my job as a designer is to help clients figure out what the key elements are, and what we have to do to make them attainable.


(All kitchens shown here by Mick De Giulio)

Sunday, February 13, 2011

Outdoor Kitchen Cabinetry


image via jobingco

Spring is a ways away, BUT days are getting longer, and I like to dream of the warmer weather to come.  I'm envious of people who have space for an outdoor kitchen.  There's such a big trend towards outdoor spaces. You used to just hear about patios, but now it's all about outdoor kitchens, outdoor living rooms, etc.  And I want one of all of them.  

In the spirit of outdoor rooms, I've recently been introduced to a new type of outdoor cabinetry from Hallmark Cabinets, one of my favorite cabinet mills.  Check this out:


Believe it or not, this is NOT actually wood.  It's a material called TuffBoard (which is sort of like the man-made decking materials you're seeing everywhere now).  Tuffboard can have a simple latex finish, but it can also be creatively finished and textured to look like old barnwood, as shown above.  

These cabinets are weather-proof and whether using TuffBoard or stainless steel, they work great in an outdoor kitchen space.  

Tuesday, February 8, 2011

Kitchen Cabinet Pull-Outs & Accessories

image from Rev-a-Shelf via rtacabinetstore.com

There are hundreds of different cabinet accessory options available.  It can be overwhelming!  Some of these accessories I consider "standards" that I use in nearly every kitchen:  roll-out shelves, pull-out wastebaskets, door-mount spice racks, and tray dividers.

There are some not-so-common items that I like to use as well.

Hafele's LeMans blind corner system: 

Toe kick step stool (I get it from Hafele): 

Blum's Orgaline Plate Holder for drawers (adjustable to accommodate bowls and plates of various sizes)

I'm also always on the lookout for custom storage solutions.

Pull-out bookcase that reveals spice storage behind it:

Pull-out blind corner unit for wine & stemware:
image via designedandmade

Drawer dividers for pan storage:
image from here

Peg board system for oven racks and other awkward items.  (I've used this application for broom pantry storage in the past as well.):
image from here

Merillat recently came out with a unique corner solution, called the CornerStore, which includes drawers flanked by pull-out pantry trays.  What a great way to use corner space!
image from Merillat

image from kbbonline.com

If you see other interesting uses of cabinet storage space, please share with me!  

Thursday, February 3, 2011

Sliding Panels Instead of Cabinet Doors?


I saw this photo yesterday on Home Design Find.  I love it.  Why?  For several reasons:

1.  Eclectic mix of classic with modern elements
2.  Ovens & shelving recessed into walls rather than cabinets
3.  Cool industrial butcher block cart (possibly a DIY-worthy project?)
4.  Open shelf base cabinets with roll-outs 
5.  Carrera marble countertops & backsplash
6.  Classic apron sink

But what caught my eye the most is the sliding framed glass panels in front of the wall shelves!  And the ceiling-mounted hardware!  Note how the panels don't cover everything on the shelves, BUT, because they sit on a different plane in front of the shelves, and because the glass is lightly textured to obscure the objects behind it, the panels completely distract you from the contents of the shelves themselves.  I love this concept as an alternative to wall cabinets.  

Monday, January 31, 2011

Park City Condo Project: Before & After

Take a look inside the condo remodel that is nearly completed!  
Before & After photos say it best, so here you go:

Main view from foyer - BEFORE

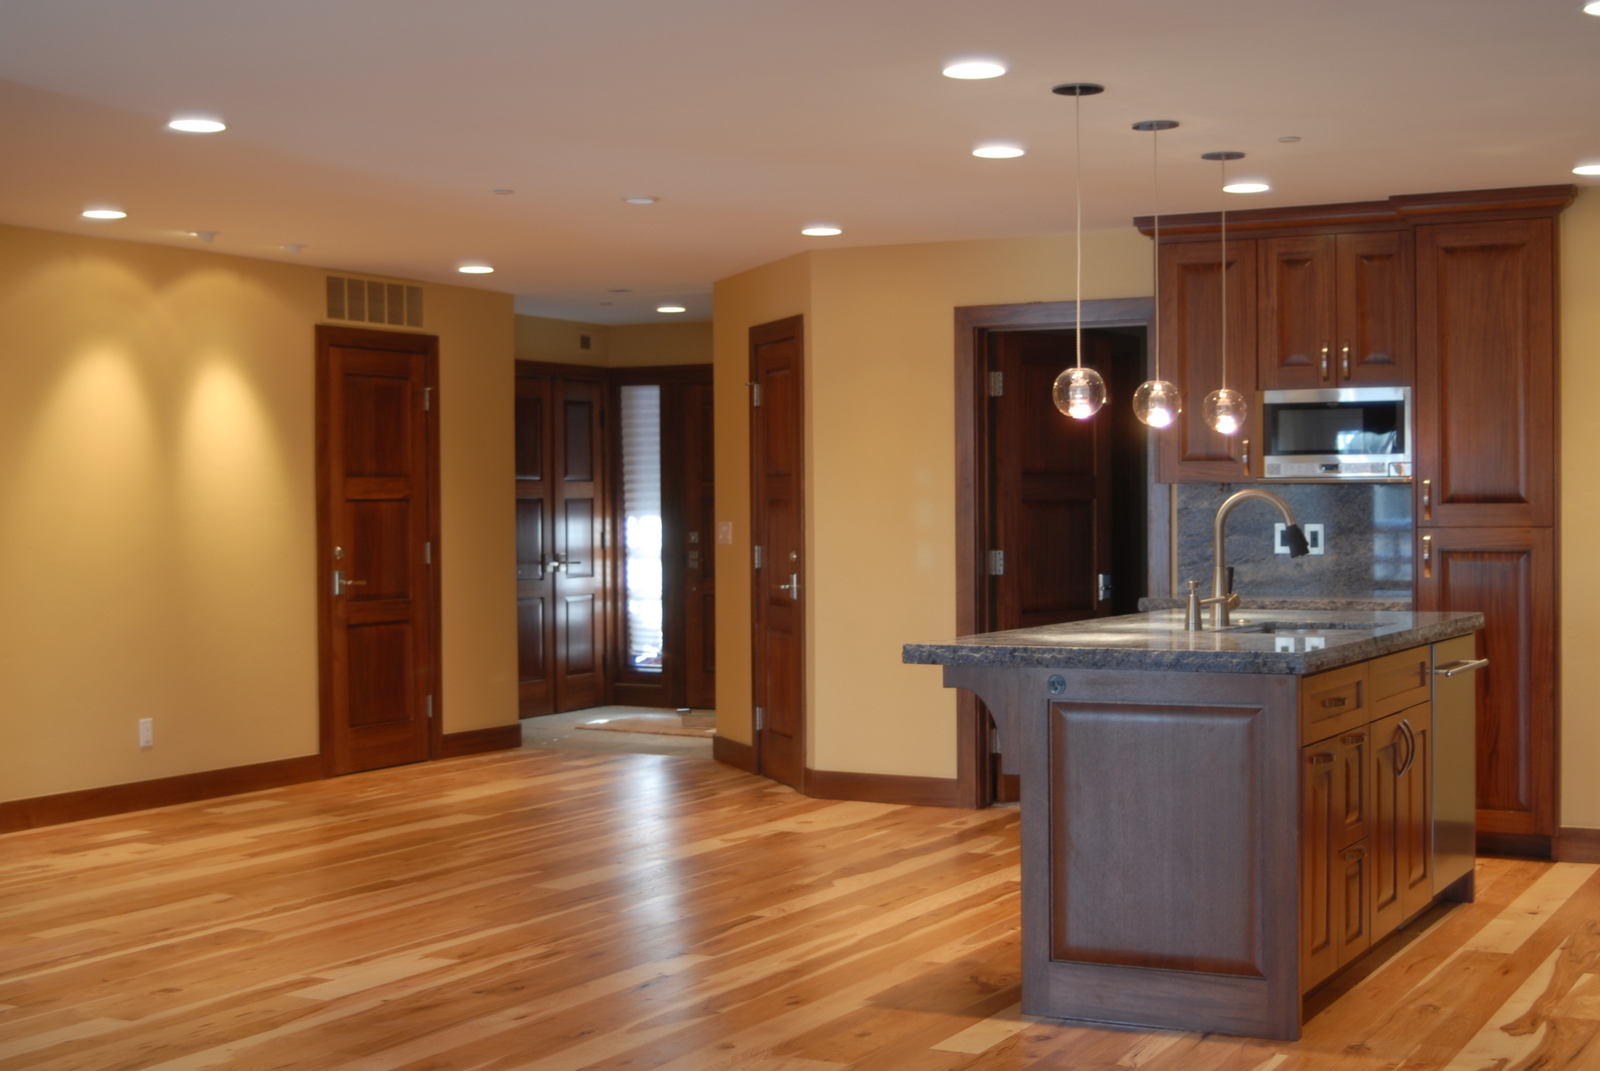
Main view from foyer - AFTER
Simply removing that kitchen wall made the condo feel 10x bigger.

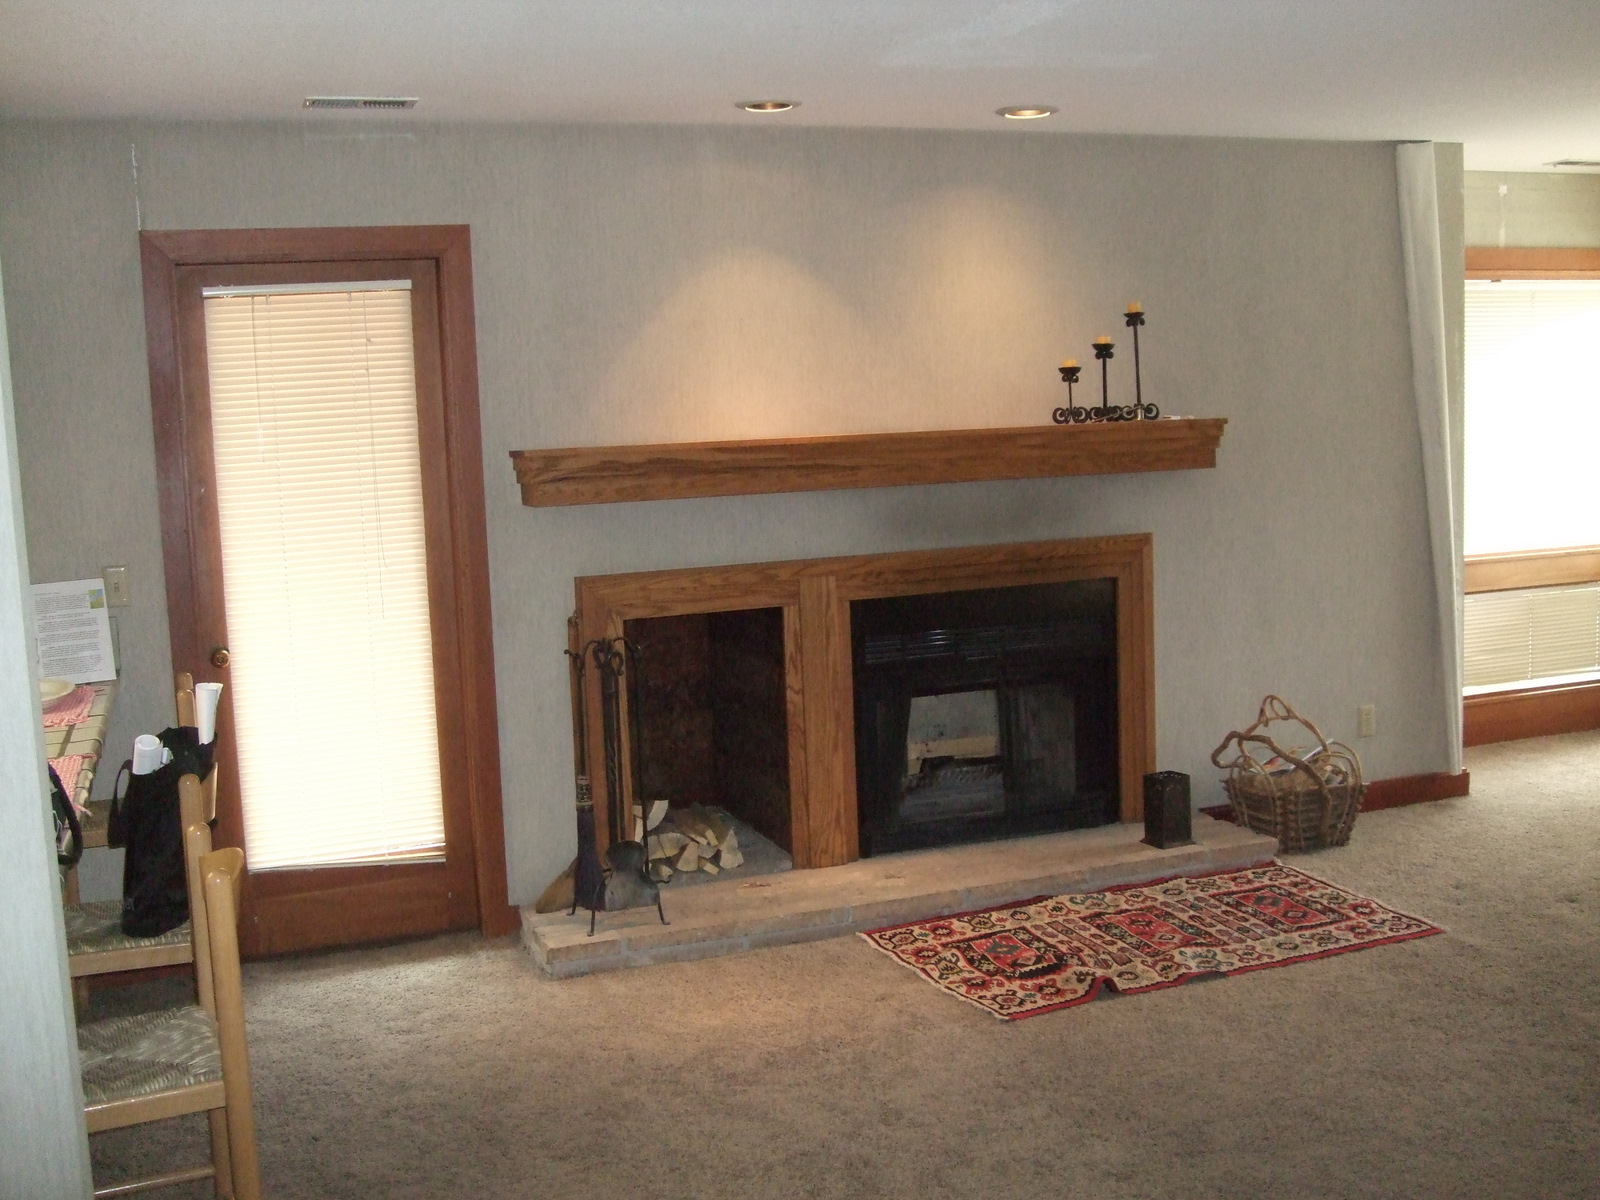
Fireplace - BEFORE

Fireplace - AFTER
We resized the fireplace so the firebox was centered in the surround.  It looks much bigger even though the firebox is in the same location (raising the firebox was easy, but moving it left or right would have been much more expensive), and is now more centered on the sitting area (furniture is still in the works).

Kitchen - BEFORE

Kitchen - AFTER

View into Foyer - BEFORE

View into Foyer - AFTER


Master Bathroom - BEFORE

Master Bathroom - AFTER
We reconfigured these walls a bit so the vanity would be part of the bathroom rather than the bedroom, and the closet is now bigger.  We also got rid of all the funky angles here for a much cleaner look.

Guest Bath - BEFORE

Guest Bath - AFTER

There are still a few items to finish, including furniture and accessories.  I hope to show more photos of the furnished space (including bedrooms) once that is all completed.

This has been a really great project to be a part of.  My client loves color and appreciates natural materials and textures, so I've had the opportunity to be a little more bold than usual here.  The contractor, Bruce Anderson, from Blue Willow Builders, has done a wonderful job and has a great team of guys that are fun to work with.   I wouldn't hesitate to send anyone to Bruce for remodel or new construction projects.  All the beautiful cabinetry, doors, trim, and fireplace mantle, were designed and built by Chris Peterson at Riverwoods Mill.  Chris has a great eye for detail and it has been a pleasure working with him on design specifics.  Other key players are Cora from Ferguson, Kathleen at European Marble, Terry from Foremost Interiors, Jayson from Kupferschmidt Electric, Tony from Workman Floors, Keene from Mountainland, the staff at Light Spot Modern Design, and many others.  Having a good team makes all the difference in the world!


My Ping in TotalPing.com